Step 3 – Retouching Skin Flaws
Now with the image on it’s own masked layer we can begin to retouch the skin and flaws in our model.
First off is any skin blemishes. Using the Spot Healing tool, we can quickly repair any acne, scars, dark spots, etc. from the skin. Use this tool ONLY for theblemishes as we will use other tools later on for other areas. This is an important first step as it will give us clean resources to utilize later on with the eyes,
hot spots, etc.
Step 4 – Removing bags under eyes
Next, we will tackle the eyes. The eyes are one of the more difficult parts of the image, because the flaws are normally in very tight proximity to the lashes and other features that can affect our healing tools.
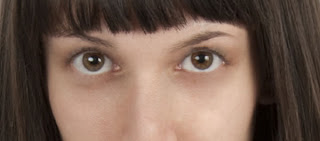
To get into these tight spaces, we will be using the Patch Tool (found under the Spot Tool button). Make a selection around the bottom of the eye and then drag the center of the completed selection into the cheek below the eye. Clean up any stray eyelashes using the Clone Stamp tool. We do want to remove the lashes on this model because they are so thin. If you feel your particular model has good eyelashes, feel free to leave them in. Above you can see the results on the right side.
Add a layer mask to the retouched layer. Erase under the eyes with a 30% opacity eraser to bring some contours back to the eyes. Be careful, erasing too much will remove all the retouching results.
Now we need to tackle the eyebrows. The eyebrows on this model are thicker than we want, so I am going to reduce the thickness using a very simple (cheat) technique.
First, start by making a selection of the upper half of the eyebrow. Be sure to grab as much of the forehead as possible. This image is difficult with her bangs moving into our field of play.
Then copy the selection using New Layer Via Copy (Cmd + J Mac/Ctrl + J Win).
Next, move the eyebrow layer down covering up her original eyebrow until you get a rough thickness that works.
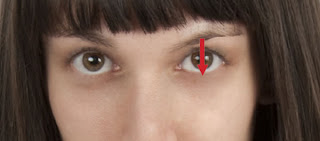
Clean up using the Eraser and Clone Stamp Tools, blending in the original eyebrow with the new overlap. Repeat these steps for the other eyebrow.
Step 6
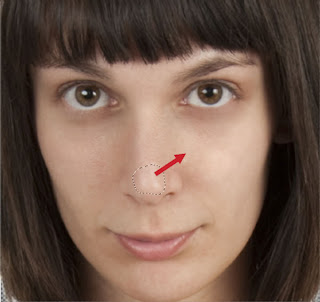
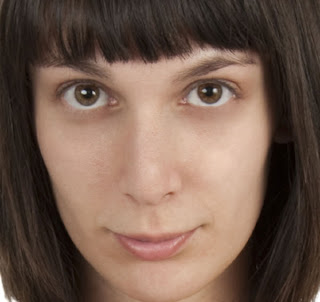
If there are any hot spots on your model, use the Patch tool to surround these areas and drag into a clean area of similar skin texture. The result will not completelyremove the highlight, but it will blend the area gradually into the rest of the skin.
Step 7
(If you did not have to remove eyelashes in your image, you can skip this step.) Adding eyelashes can be difficult unless you have an Ace in the hole. Mine is to utilize a set of Eyelash Brushes. These can easily be found by searching "Photoshop Eyelash Brushes" on the Internet. There are several to choose from (many free, some
pay). Load your brushes using your Brush Preset Panel and going to the pull down to
"Load Brushes".
Use the Brush Panel to control the angle and size of your brush. Be sure to paint on a NEW LAYER so you can control the opacity and color independently.
Step 8
Finally we are going to add some digital makeup. This is as simple as it can get. Create different layers for each area of makeup you apply (cheeks, eyes, lips, etc.) and add in color by painting at 100% opacity with a soft brush. This is going to look silly, but it will help us map out where the makeup is going. Be patient and
Now after a slight freak out, select each layer and change it’s blending mode from Normal to Multiply and reduce the opacity as needed. As you can see, the results are much improved from before:
Finally we are going to adjust the hair and add some pop. Start by making a selection of the existing hair. Create a new blank layer and fill with a brown color. Againthis is going to look odd before it gets better, but trust me it does get better.
Next change your layer blending mode from Normal to Overlay.
This is a little too intense, but we can drop it down if needed using opacity.
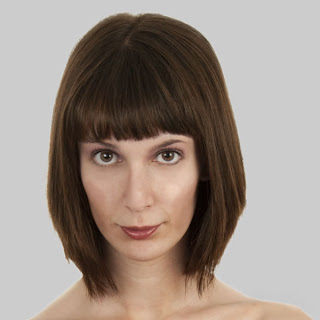
Step 10
Finally, Adjust the eyes using a Hue/Saturation adjustment layer. First, make a selection of one eye using the elliptical marquee tool. Then add the Hue/Saturation Adjustment Layer. Adjust the one eye to your liking. Then using your paintbrush tool (set to Black 100% opacity) paint in the other eye on the Adjustment Layer’s mask.
To finish the image, drop a backdrop behind your model and viola! A retouched model.
Final Image
Here is the final image. With just a few enhancements, you can take an ordinary shot to something that pops using these simple techniques. Enjoy!
Shaan Graphics is a premier Image Editing service provider, providing this exclusive glamour retouching service with Internationally lowest price guaranteed. Shaan Graphics Image editing service starts from $0.50 only.


2 comments:
I have been running a blog within this same topic with regard to merely 2 years now, what I possess often thought is that it will take time to be able to conquer with this factor. But when I just read your post, I had been genuinely amazed that there are lots of ways to do it and have and even much better advantages. Photoshop Clipping path is best and low cost service please visit http://www.clippingpathsource.com/ for more information about clipping path.
Wonderful Tutorial, thanks for putting this together! This is obviously one great post. Thanks for the valuable information. Read more: background removal service
Post a Comment